The first is several layers of painted and dyed papers topped off with some lovely corrugated cardboard and a triptych of more painted papers, cut and adhered mosaic-style, to heavy black card stock. It measures about 30" x 30" and will need to be framed.
The second is a large piece of dyed cotton batting topped with a machine-pieced quilt top constructed of dyed and painted cotton. It's current size is about 24" x 36".
Before I begin stitching this piece, I will need to resolve the issue of how it will be mounted (I think I will stitch it to a large piece of hand-dyed cotton and stretch the whole thing over stretcher-bars), but more than that, I need to convert these three paper pieces:
into fabric elements. The bottom element, the one that looks like a straw mat, is mulberry paper that I molded and shaped around pieces of straw using matte medium. Once it was dry it was painted with acrylics, sprayed with walnut ink and sponged with Lumiere paint.
I am constructing the fabric version in much the same way. I have painted white muslin with green acrylic paint. I really worked the acrylic into the fibers with a chip brush and a little water because when it was time to cut the edges, I didn't want any fraying. Once dry, I sprayed it with walnut ink. In the meantime, I painted the straws in the same color and sprayed them, as well.
I'm still not certain how I will adhere the straws to the fabric- the method I used for its sister paper piece won't work- but once that hurdle is jumped, I'll sponge it with Lumiere and I think it will be a pretty good match.
The third project I've tasked myself with for this week is a small piece of textile art I'm constructing for our annual holiday gift swap over on Radio Paradise.
I have dyed, painted, stamped and otherwise tortured two small pieces of fabric. One is a piece of simple white muslin, and the other- the backing fabric- is artists' canvas. Like the green fabric above, I scrubbed white paint into the fibers of the artists' canvas so that it would resist fraying when cut to size.
I want this little doo-dad to be a genuine "quilt" (three layers held together with stitching), so I will layer it with a piece of batting. Because the batting might be visible in the final piece, it needs to coordinate, so I set about this morning to test a few dye recipes on four pieces of batting.
Since this is just a little piece of batting and I am on a tight time limit (the swap recipients must receive their presents by December 13th!), I decided on a quick dye with RIT. RIT dyes don't require a mordant to set the color, so the batting can be soaked in the dye for a few minutes and then set in the microwave oven for 1-2 minutes.
Unfortunately, I must have played a nasty little joke on myself the last time I used my RIT liquid dyes, because the lid to the purple was loose and I didn't realize. Today, when I picked it up by the cap, the bottle dropped out of my hand, landed on my desktop and splashed everywhere.

I snatched up a piece of batting that was waiting to be dyed, and sopped up the mess.

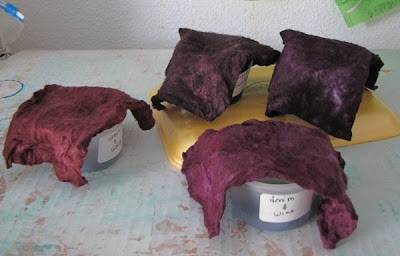
Once I got that cleaned up (and I still haven't gotten the dye off the windows that- dumb luck- were just cleaned yesterday) I went ahead and did four little dye samples to find the right purple for my batting.
And here they are being auditioned on the design board.

Obviously, none of these pieces is complete... hopefully one or more will be, soon, though. As usual, I'll post my results.
Until then, happy creating!


4 comments:
attaching the straws to fabric should be no problem with a strip of fabric sewn into little half loops like you would do it for a kids' pencil pouch (the one with a loop for each pencil).
Lots of great stuff in progress Judi! I had fun looking through it all. I really like the coloring of the last photos with the purples.
Don't step on me! LOL I'm right here behind your left shoulder with my mouth open to see what you are doing! I really like the last guy. I am also looking at my bag of batting for test stitches quite differently! Neat!
Wow, you have lots of exciting projects on the go! It's so much fun to follow along as you create!
Post a Comment