

... and yesterday afternoon, it looked like this...

Not all of the unpacking is completed, as evidenced by the boxes on the left side of the photo, but the cabinetry and shelving is going in and a temporary work station has been set up so I can get back to work!
The Houston IQF is fast approaching, and I needed time to blow the cobwebs off my muse, who hasn't had a chance to stretch herself in almost eight months. As I've said before, I'll be demo'ing for this show, and one of my demo sessions is all about working with GelliArts gel plates, so I really wanted a chance to practice. Last night, I broke out as many supplies as I could get my hands on (most of them are still boxed up) and I started sloshing paint around.

The good news is, I haven't forgotten how!
I spent some time carving new print plates out of foamcore. Foamcore is available in most hobby stores and is a high-density Styrafoam sandwiched between two pieces of paper. Peel off one side of the paper (soak it with water if you need a little help), and you're ready to create your own print plate!

I cut mine to the approximate size of my largest gel plate, about 8" x 10", and using a ballpoint pen, doodled into them. These are super simple to generate and help you give your work unique, you-made-them marks again and again. They can last literally years!
In order to get complex prints from a single pull, I used some lovely, thick, Golden Open Acrylics. The "Open", in this case, refers to the amount of work time you have before the paint dries- open acrylics dry very slowly, giving you much more time to play than standard acrylics. The complexity of the prints occurs when layers of open acrylics build up on the foam plates.

So here's how I do it.
Using the Intaglio method demonstrated in the brilliant video on the GelliArts blog (go watch, you will not be sorry you did!) I load up my print plate with paint, making sure to press the paint into the cravings made by the ballpoint pen.

I "kiss off" the top layer of paint with a piece of copy paper and put that print aside for further layering in the future. Then I place the gel plate on top of the foam plate and lightly brayer over the gel plate, transferring the paint within the carved lines onto it.

I kiss off one more print from the gel plate, put aside that print for later, and wipe the gel plate clean. This is where the fun now begins.
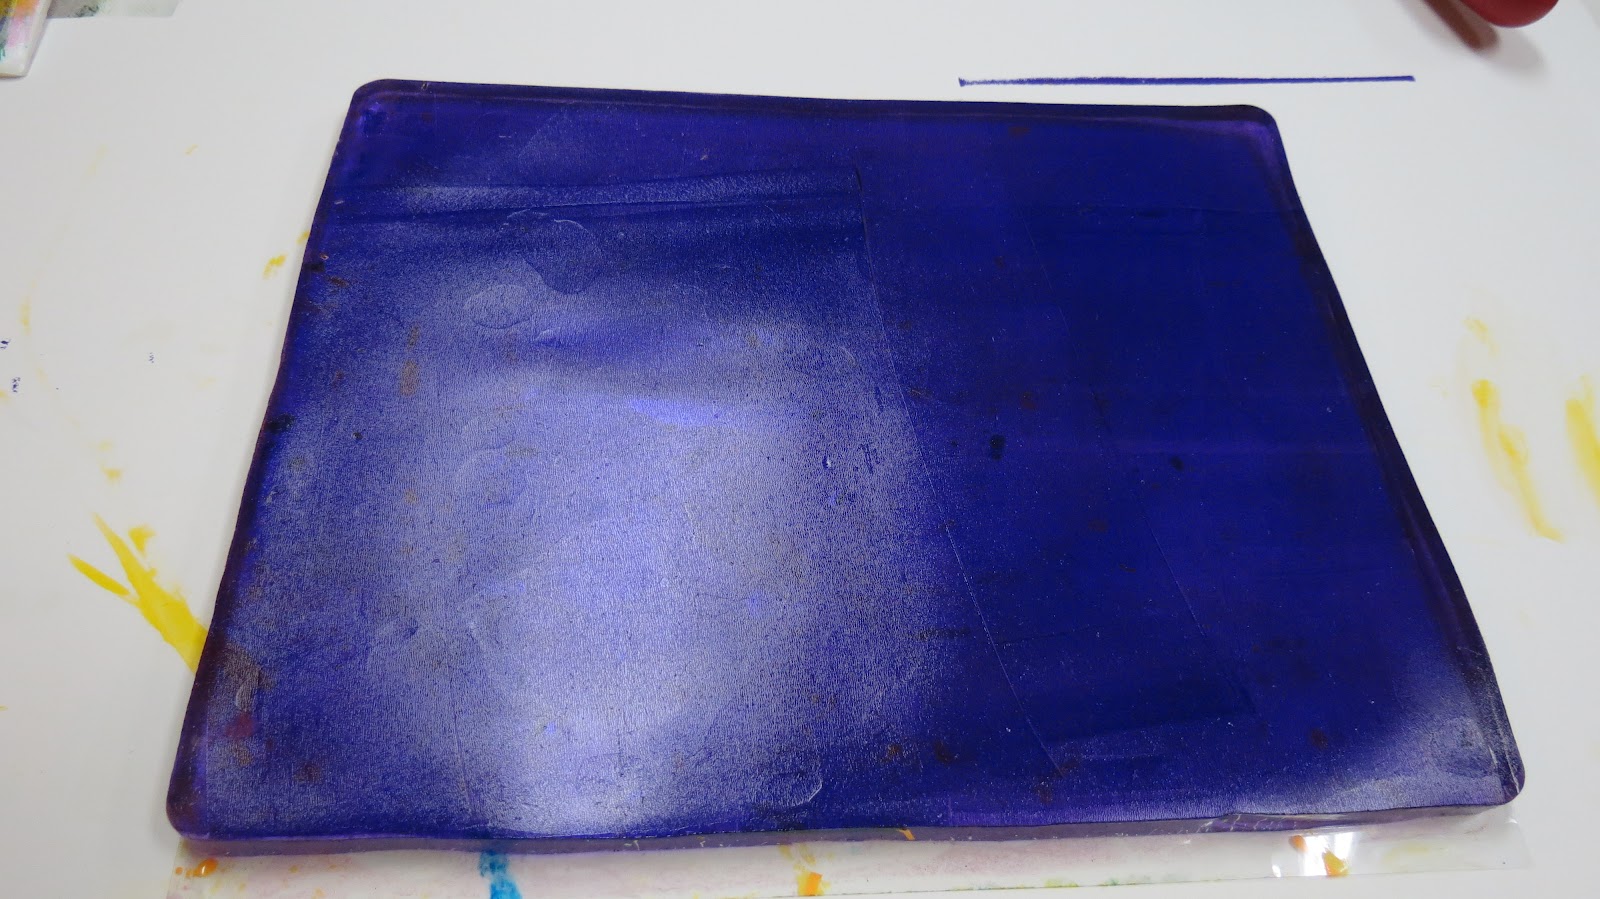
Choosing a wholly different paint color- usually one that contrasts nicely with the previous color- I lightly ink up my gel plate.


I turn the foam plate over onto the gel plate, right side down, and press gently.
This transfers not only the image from the foam plate onto the gel plate, but also any remaining paint the foam is hanging onto. Because I'm using "open" acrylics and the dry time of the paint is slowed, the paint on the foam plate remains wet and fresh.
I remove the foam plate and my gel plate is now ready for another print.

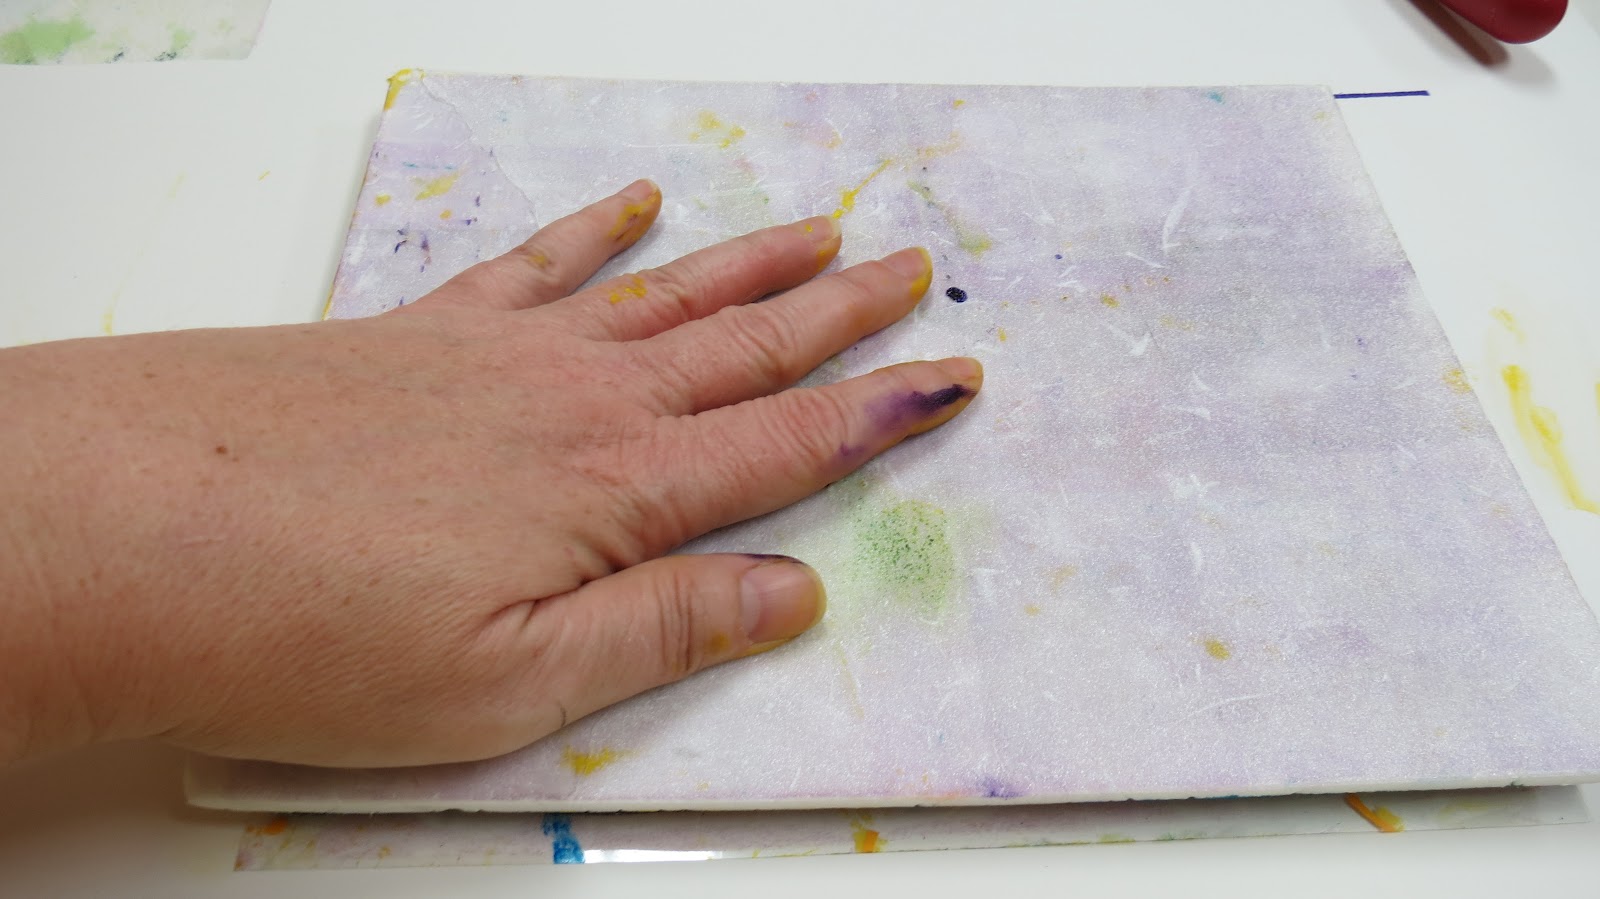
Using lightweight copy paper (my favorite because it collages beautifully, but you could use any kind of paper OR fabric), I lay the paper onto the gel plate, burnish over it gently with my hands or a soft rubber brayer, and gently peel the paper off the plate.

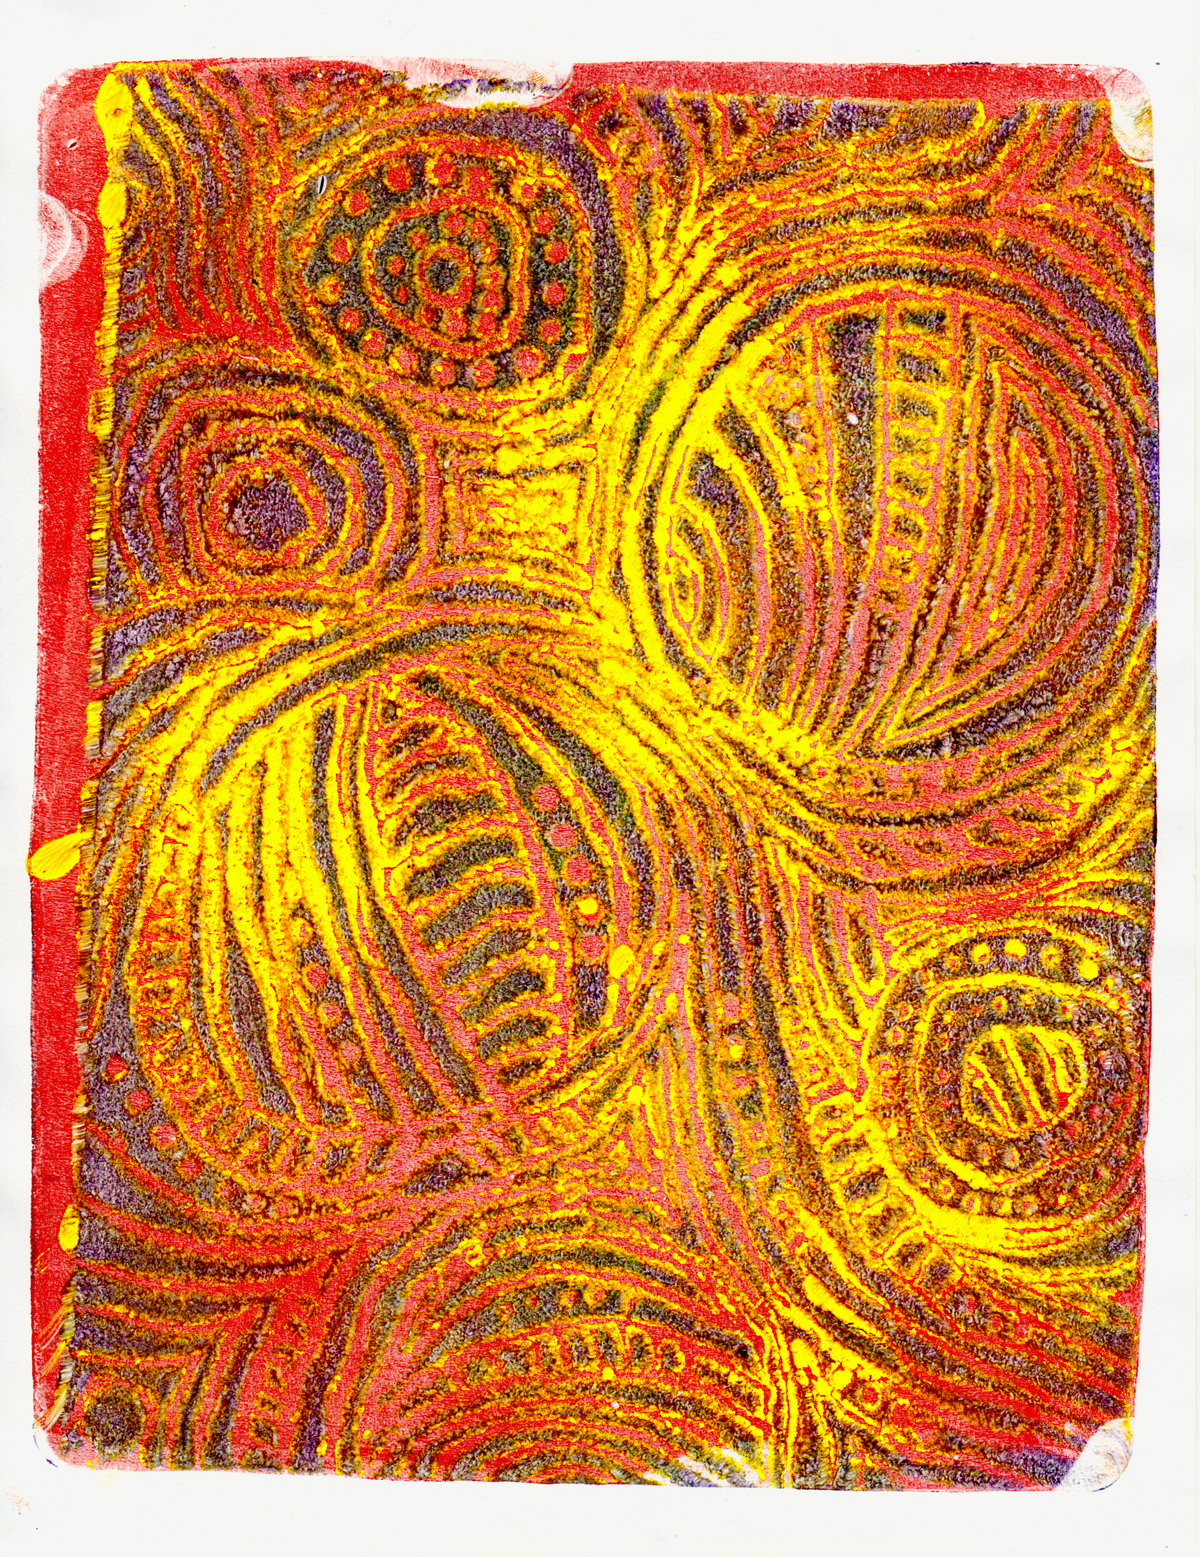
Then I continue the process, allowing the gel plate and the open acrylics to create the magic for me...

New color...

... spread onto the gel plate with a soft brayer...


... press the foam plate gently into the gel plate and peel it off...

... lift my print off the gel plate with copy paper, again....


... and again...


... and again...


... and again, endlessly...


When you're finished with your printing session, be sure to remember to take as many "ghost prints" off the foam plate as you can, there's still a lot of paint down in those carved lines!
Here are more prints using the same technique with a different foam plate.


A couple of tips:
~ Be brave when you change colors on the gel plate... go for as much contrast as you can, those wind up being the most fascinating prints!
~ If there's any paint left on your gel plate after taking your print, lay down another sheet of paper or fabric and take a "ghost print".
~ Use the paint left on your brayer to colorize a new sheet of paper, or to add depth and color to a previous print.
~ Clean your gel plate in between prints (there should be little to no paint on it, anyway), but don't clean the foam plate until you're finished with your printing session!
~ Have fun and breathe... this isn't rocket science!
Happy creating!
15 comments:
До чего же это крвсиво!... Удачи Вам в новой студии!
It's so beautiful! ... Good luck in the new studio!
Sorry!
Beautiful! It's obvious that you're glad to be back in the studio.
Great tute - thanks for sharing!
Thanks for the great tutorial. And what a big studio you have! All the better to make things in!
Great Tutorial Judi! Thanks for sharing the Gelli 'know how' - looks like you're definitely ready for Houston IQF!
Love your pieces! Incredible work in what promises to be an incredible studio.
I will be in Houston this year again. I would love to say hello.
glen
Judi, What a great tutorial! Love your prints.
This looks like a lot of fun. I still want to try the gelli plate. I'm glad that you are able to get some art time in now.
Excellent. I saw the video and explanation is better. Wonderful stuff and glad to see you back in action!
Very cool!!!!
Great tutorial. I just pulled my Gelli plate out for the first time a few days ago and started playing with it.
Just popped over from the Gelli Arts FB page - thanks for the step by step, it was really helpful!
that looks great! thank you for sharing; i found the link via pinterest and still want to read all of your posts!
best wishes
elenor
So cool, Judi. I'm looking forward to trying this. I have a fellow-feeling with you as I have had all my stuff packed up for months too! Our new house is nearly ready and then I can unpack all my boxes into my wonderful new ARTHaven space and start creating again!
I am loving your blog... You are so creative, and so generous in sharing your amazing techniques. Thank you!
Shoshi
Post a Comment