Showing posts with label hand dyed fabrics. Show all posts

Tuesday, February 15, 2011

New Fiber Art!

I bet you thought I forgot how to make fiber art, didn't you? Well, pshaw!


(hand dyed and painted cotton mounted on stretched canvas, painted cardboard embellishments)

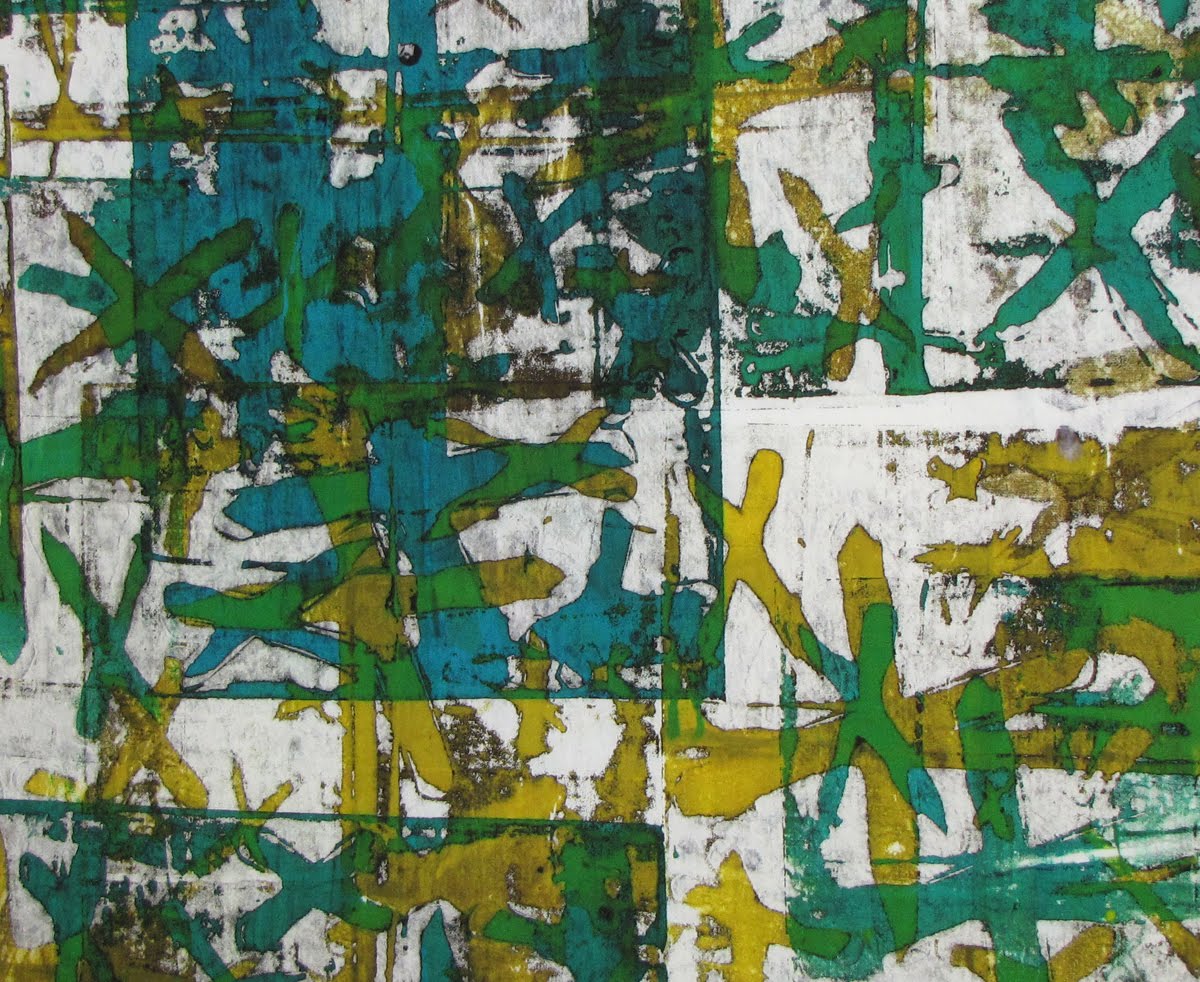
(hand-dyed, deconstructed screen printed and painted cotton and silk mounted on Lutradur backing)

And just because I can't seem to stay away from my sketchbook... 

 (pear study in acrylics, pastels, colored pencils and hand dyed fabric)

Thursday, October 7, 2010

Home Again and Studio Doings

After countless cities, airplanes and hotel rooms jammed into one five-week period, we're finally home again. I'd tell you all about it, but a vacation is usually only interesting to the people taking it. But if you're really dying to know, here are some of the photos I took on my various travels, knock yourselves out!

Monday saw me back in the studio and I have to admit, after being out of it for so long, it felt a little foreign to me, like it was someone else's space. To get back into the groove, I charged more screens with thickened black dye.


These guys were done simply enough... I thickened my dye by adding Jet Black dye powder to clear print paste, putting it into a syringe with a very narrow tip, and drawing it onto the screens. Then they sat in the driveway all afternoon to bake in the sun.


Can I admit that I always, always, always seem to make far more thickened black dye than I can use in one session? As a result, I find myself scrambling to prepare more fabric to use it on, rather than put the excess down the drain.

Because I had so danged much left over, I tried a technique written about by Leslie Tucker Jenison in the Oct/Nov 2010 issue of Quilting Arts.


In the article, Leslie uses tiny scraps of paper, MX dyes and silk screens to create interesting textures on fabric. I only slightly modified this technique by using scraps of cotton fabric, which I cut with a pinking blade in my rotary cutter.

I used long, narrow scraps of Pimatex to print on and then, as Leslie demonstrated, scattered the scraps across the unprinted fabric, wet out the screen with my thickened dye and continued to print down the length of the cloth.


The two on the right were printed using Leslie's method and the piece on the left is a monoprint taken from the paper that had been placed under the fabric before printing.  Pretty neat results, and instead of washing all that great dye and texture out of the screen, I left the bits of fabric stuck to it, left it with the others to dry in the sun, peeled away the scraps, and will use it later in the week to do some deconstructed screen printing.

And lastly, there are only two days left to sign up for my Dharma-sponsored give-away. On Saturday, October 9, two names will be chosen by a random number generator to receive one of these fantastic dye kits. All you have to do to be eligible for the drawing is to comment on this post.

Until Saturday, happy creating!

Thursday, August 26, 2010

Off To Fabrications!

On Sunday morning, I leave for a week-long workshop at Fabrications in Kalamazoo, MI., with Carol Soderlund called Color-Mixing For Dyers. I'm excited to go and while I wanted to pretend I was on vacation all this week, my work ethic just wouldn't let me, so things got done!

Two 1-yard x 45" pieces of white Pimatex cotton got the deconstructed screen printing treatment.

After printing this piece off, I was sure it would be my favorite coming out of the washing machine.


And I am pleased with the results.

(36" x 45"- a little blurry, sorry!)

(detail)

It has some nice details, but once it was washed, dried and ironed, it looked a little blah to me. Not sure what will happen with it, next, but that will have to come after my retreat!

The second piece I deconstructed this week, which I forgot to photograph before I wrapped it up for batching, looked when it went into its plastic package like it could just wind up a blobby mess of ugly color. I held out hope that it would still wash out beautifully, but I was blown away by the result I actually got.

(36" x 45")

I used the same screen on both pieces, allowing the first few pulls on the turquoise/black piece pictured above to help soften up the dyes, and then moving it to this piece. 


The screen was constructed easily enough. I cut wonky X shapes out of clear contact paper and pressed them onto the front of the screen. Then, from the back, I wet the screen with thickened black dye. After it had set up, I hit it with the black dye again and left it to dry for a couple of weeks. When it was dry, I peeled away the contact paper and the screen was ready to use.

To deconstruct it onto the fabric above, I started with lemon yellow print paste, covered most of the surface with pattern, and then when the yellow dye was used up, I switched to turquoise print paste, knowing it would mix beautifully with the yellow to produce a lime-y green. 

I'm excited because I feel like this is the first truly successful deconstructed screen printing I've done. From this piece, I've learned how to achieve bright, vibrant colors, and I feel like I'm beginning to add depth and sophistication to my usual color palette of bright, cool colors with the stark addition of black.  So yeah, happy all around, today!

Earlier in the week, I finished the last few 2-page spreads in my Sketchbook Project journal. I will hold onto the book for a while (I'd like to be able to show my dad when I see him in September) and then send it back to the Brooklyn Library.


The last page, pictured above, contains a listing of the materials, mediums and grounds I used to construct this book. 

I will be home again on Saturday, September 4th... until then, happy creating!

Monday, July 27, 2009

What's Keeping Me So Busy!

Hi everyone!

I know it’s been a week or so since I last posted, but I’ve been busy with all kinds of projects, some of which I’d like to tell you about today. But fair warning, this post is photo-intensive, so if you have load time trouble, I apologize.

First on the agenda is that I’ve decided to enter two of my assemblage pieces into a Call For Artists from the abecedarian gallery, in Denver. I found this listing on the Fiber Arts Calls for Entry blog. The theme of the show is “assemblage and collage” and gives free reign on the materials used in each piece.

I’m going to enter this piece (if you click on it, you'll see a larger photo of it), a collage of painted fabrics and paper, fibers, my own hand-made beads, a little bamboo and a bit of wire. It measures 12.5" by 16.5" without its frame and is now hanging in my husband’s office.


This is the second piece, which is a collage of painted fabrics and papers, lots of hand stitching, dyed scrim and thread, and hand-made beads and buttons. It’s mounted on white cotton.


The entries will probably go out tomorrow or the next day. Wish me luck!

The next project I’d like to share with you is some of the research I've been doing on a commissioned textile/quilt piece which I will be starting officially in late September. My hope for this abstract quilt is that it will be heavily textured, mostly linear but with a touch of chaotic movement- which is sort of my trademark- and wonderfully touchable. I will be attempting to force the piece to distort so that it will undulate gently off the wall, rather than laying flat, and I'll be stitching it before dyeing it.

Towards that end and for the last few months, I've been assembling quilt sandwiches using all different types of materials, such as paper, various shrinkable and non-shrinkable batting and interfacing, and synthetic fabrics. Each piece gets machine stitched, painted, dyed, shrunk, distorted... anything I can think of to alter the surface in the way I envision for the final piece. All of these test pieces are small; I'm keeping them in a 3-ring binder inside plastic page protectors just so I can keep all of them together with the notes I took while constructing them.

The first two pieces were stitched and then dyed, and even painted a bit after quilting. Not thrilled with the style though- too homey for my client, who wants clean, modern lines and edgy materials.


By now, though, I'm realizing that I want more densely-packed stitching, not less, so I start moving in that direction. Also looking for more distortion, I stitched the next piece to Tyvek and then melted it (NOTE: all reasonable safety precautions should be observed with this process... including the careful use of a respirator!)


I liked that look a lot but continued to experiment. I tried different stitch patterns in the hopes of moving the fabric around more, dyeing first and then stitching to emphasize the thread choices. and using rayon and other melt-able fabrics as backing materials.


I was getting closer to what I wanted, but just wasn't there yet, so I kept experimenting, this time with paper.

The first paper test was on an unpainted grocery sack that had previously been gesso'd (a white primer), and stitched to Tyvek. Then it was painted with acrylics and shrunk.


Pretty cool, though because it was brown paper and not fabric, the Tyvek met with some distortion resistance.

The next paper piece was painted first and then sandwiched with batting and muslin. I used various weights of thread on this, mostly just to see what they would do, and all of them preformed beautifully considering the thickness and texture this had.


The next few experiments surrounded the idea of using directional stitching to produce puckers and ridges. Some of these pieces were dyed first, some painted after stitching.


Finally, I hit upon the idea of adding movement and texture to the piece not just with stitching and foundation distortion, but by taking advantage of the damage the raw edges of fabrics suffer during the vat dyeing process.

By the time a piece of fabric has been soaked, dyed, soaked again, rinsed multiple times, laundered in the machine, and finally dried, the raw edges of even the highest thread count fabrics are mangled and frayed and absolutely lovely.

Occasionally, depending on what product you used to color the fabric, the fringe even collects a higher concentration of pigment than the woven fabric itself, which produces such lovely, soft, vibrantly-colored textures.

Wanting to play on this raw edge notion but still wanting to have a finished-edge quilt, I hit on the idea of stitching my surface treatment directly onto a finished and bound quilt sandwich.

I constructed a small quilt sandwich with a PFD white cotton top, wool batting (still in the hopes of producing some shrinkage and distortion later on in the process) and a white muslin back. I did a pillowcase turn to finish the edges. I stitched everything with white cotton thread because I want it to dye right along with the fabric.

To the finished backing, I stitched narrow strips of torn white cotton fabric. I placed them close together so they would shoulder each other around for space. The texture I achieved is almost too pretty to dye!


But dye it, I will, probably today or tomorrow. I expect that those fragile fabric edges will take qite a beating in the process and I can't wait to see what the final result will be. I will post photos in my next blog entry.

This post has gone on long enough for one day, I've no desire to monopolize your very precious time, so just let me remind y'all that not only is there still time to sign up for my grand opening give-away, but you can also enter up to three times by commenting on that post on three different days!

Keep flying high and happy creating!


Sunday, July 19, 2009

Things I Love

Thread schmutz


(The threads that hang off the edge of fabrics after they've been washed, dyed, rinsed, soaked, washed again... well, you get the idea. Yes, I actually save this stuff... the birds love it for their nests and as often as not, some of it will end up in my quilts, too.)

Cheapest Alter-able Tool Ever:


(A wallpaper seam roller with sticky-backed fun foam shapes attached to it to create a continuous roller stamp. The plastic rollers are about a buck in the hardware store and the heavy wooden-handled ones, which are my favorite, cost about 6.00 but they last for years. The sticky-backed fun foam shapes can be bought in craft stores by the bucket, in the kid's departments. Each bucket is about four dollars. Use the shapes as-is or cut them up to alter them. My favorite way to "ink" them is to squirt paint/reinker/dye/textile paint/dye-na-flow/etc into a small polyester sponge- the yellow ones they sell in the grout or automotive departments that don't get stiff when they dry- work it in a little with a craft stick to even out the pigment and then roll the stamp roller onto the sponge. It's just like using an ink pad- which also works, btw.)

Over-Flowing Stamp Drawers


(This one contains as many of my favorite tribal stamps as it can hold. I've been carving stamps for years... can you tell I'm a little obsessed with it? These work great on fabric or paper.)

A Size 90 Topstitch Needle


(With ANY thread.)

Rain


(After months of drought.)

Thursday, July 16, 2009

More Gradation and Odds and Ends


Mornings around here are quiet and soft. I'm an early riser and I like to hit the ground running... It's the perfect time to get a lot of work done before the heat really cranks up and while my energy is at its highest. But yesterday morning I woke up feeling restless and unfocused. I couldn't settle in and decide what I wanted to do. I wandered from space to space- the studio, the sewing desk, the garage- and nothing leaped out at me. I was on a slow build to a cranky day.

And then I noticed the terrible, mangled living room curtains. For various reasons (I have cats- 'nuff said), these sad, limp little sheers, which I had loved when they were new, have seen their last fabulous day and have been in a slow decline for a while. Looking at them made me crankier... until I flashed on that three-yard expanse of white cotton in my stash, begging to be turned into curtains.

Suddenly, my energy spiked and I forgot about how grouchy I was all set to be.


So, another gradation, this one intended to match the decor of my living room. Now, understand- my walls in that room are yellow . That's right, yellow. Stop laughing, they look great! The accents in the room are in rich browns and reds. So it made sense for me to do a scarlet ~> lemon yellow fade.


The colors turned out even more vibrant and beautiful than in the last batch, but this run had some difficulties. The two darkest pieces somehow wound up with small spots of a dark dye on them- I suspect the green dye from earlier in the week. I'm not sure how that happened because I had totally cleaned out the dye area before starting this new batch (even the tarp had been laundered). Nonetheless, there they are, little irksome spots. I hope I figure out where they came from before it happens to another batch. It doesn't matter in practical terms for this batch- it's just curtains for the living room and those spots will be easy to conceal- but it would be good to understand what happened, for future reference.

When I get the curtains stitched and hung, I'll snap some shots and post them. It's going to be all ragged edges for these babies... no tidy seams, no cut edges. I'm going to "collage" curtains. Sounds like fun, yeah?

That's the good news. The bad news is that we're now officially in a drought situation. We haven't seen rain in months and our city has clamped down heavily on water violators. Even if they hadn't, my own conscience would not allow me to continue using as much water as I have been in these last couple of weeks. So no more immersion dyeing for me for a while- at least not until this drought breaks.

In the coming weeks I'll use all these wonderful fabrics to print and screen onto, for experimenting with discharge pastes and soy wax batik, and of course, to make art quilts.

Odds And Ends

- The International Quilt Festival/Houston catalog arrived yesterday. It will take me the whole weekend just to read through it all and decide which class(es) I want to take. There's a three-day class on dyeing and constructing art quilts with silk (a fabric that I must admit intimidates me somewhat) which has me drooling into my bra, so that could be the winner.

- The hummers have returned. It's a little early for them so this could just be a lone rogue but I put one of the feeders out, anyway, and will keep it maintained until they migrate back across this area in the late summer/early fall. Wish me luck snapping photos- they're quick little guys who fly like they're on rails. The odds are in my favor, though... by September we'll be knee-deep in hummingbirds.

- I started a new quilt with some of my hand-dyed fabrics. It's not large, maybe 22" x 26".

This is a down and dirty photo of it in its planning stages. I take these photos once I'm satisfied with a layout, so I can disassemble the piece and then reassemble it properly with fusing, stitch, spray mount, or usually a combination of all three. The photo quality doesn't matter at this point- it's just a visual map.


This piece consists of a hand-dyed background in green, fused to Timtex for stability. It incorporates more hand-dyed fabrics as well as a dyed paper towel. This is a detail of some of the stitching:


(P.S. I hate knotting threads at the back of the quilt. Yeah, I do it anyway, but you can't make me like it).

- I've written an article about revitalizing your creative muse and have submitted it, along with a few photos, to the magazine Cloth, Paper, Scissors in the hopes that they will want to publish it. If not, I'll post it here, instead. Wish me luck!

- I've also decided to enter into The Eye of the Quilter: Inspiration contest, sponsored by Quilts, Inc., the amazing folks behind the International Quilt Festivals. This is a photographic contest- you submit three of your best photos (they don't have to be quilt-related), the ones that you feel inspire you the most. I've only just begun taking photos but what the heck? I'll never know what it's like to try these things if I just sit and watch them pass me by!

Have an awesome week and happy creating!
- Judi